How to set up email forwarding on Namecheap

Quick Answer
To set up email forwarding on Namecheap, log in to your account, go to Domain List, select your domain, and configure Email Forwarding under the Redirect Email section. Then create a forwarding address and set the destination email.
Steps to Set Up Email Forwarding on Namecheap
1. Log in to your Namecheap account
Go to your Namecheap Acc
Click Sign In
Access your dashboard
2. Open your domain list
Click Domain List
Find the domain you want to manage
Click Manage at the far right of the domain

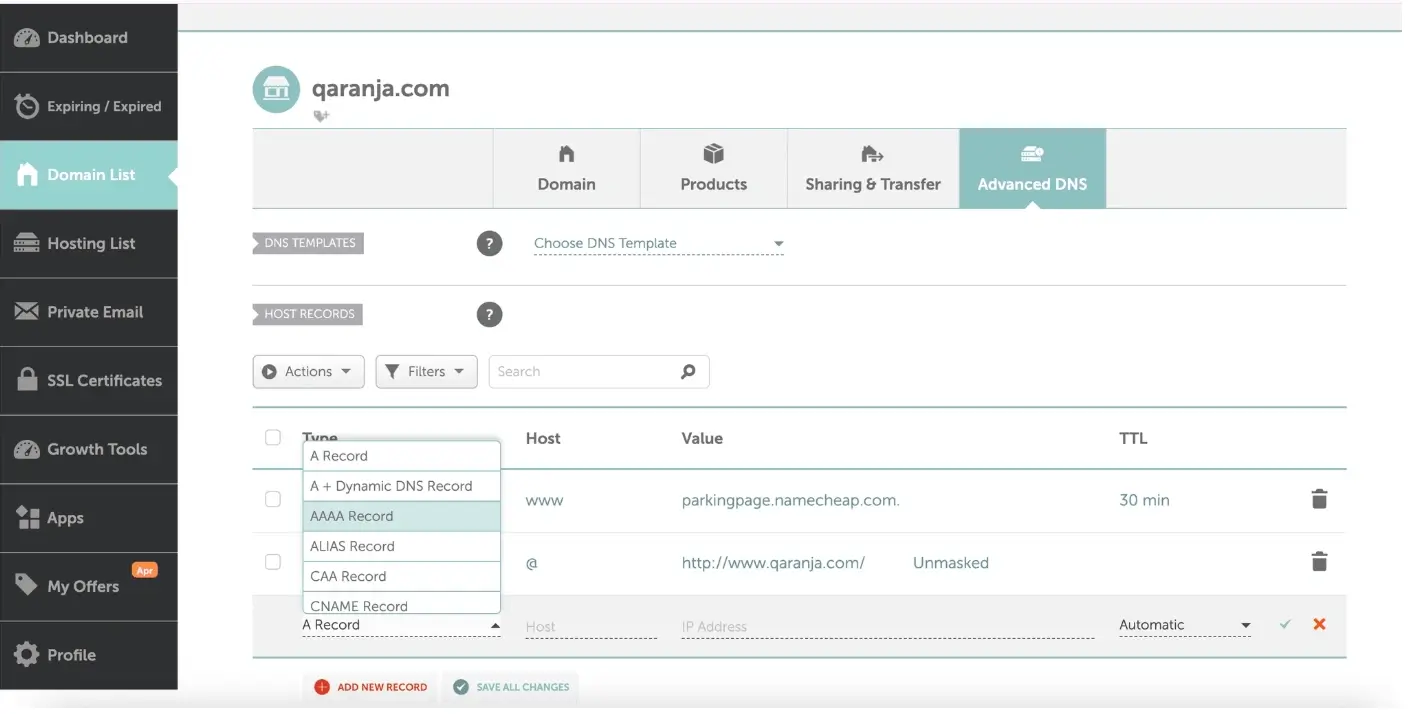
3. Open Advanced DNS
Click the Advanced DNS tab on the menu at the top of your screen
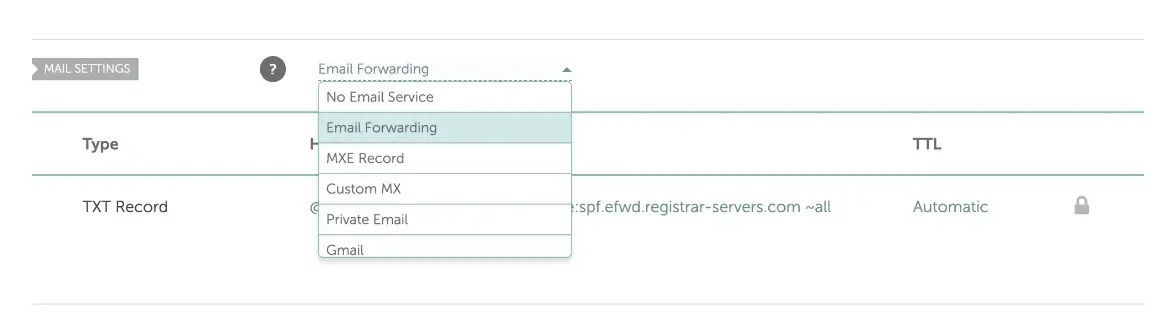
4. Set up email forwarding
Scroll down to “Mail Settings” then select Email Forwarding from the dropdown menu
5. Add a forwarding address
Now go back to the Domain tab on the top menu of your screen
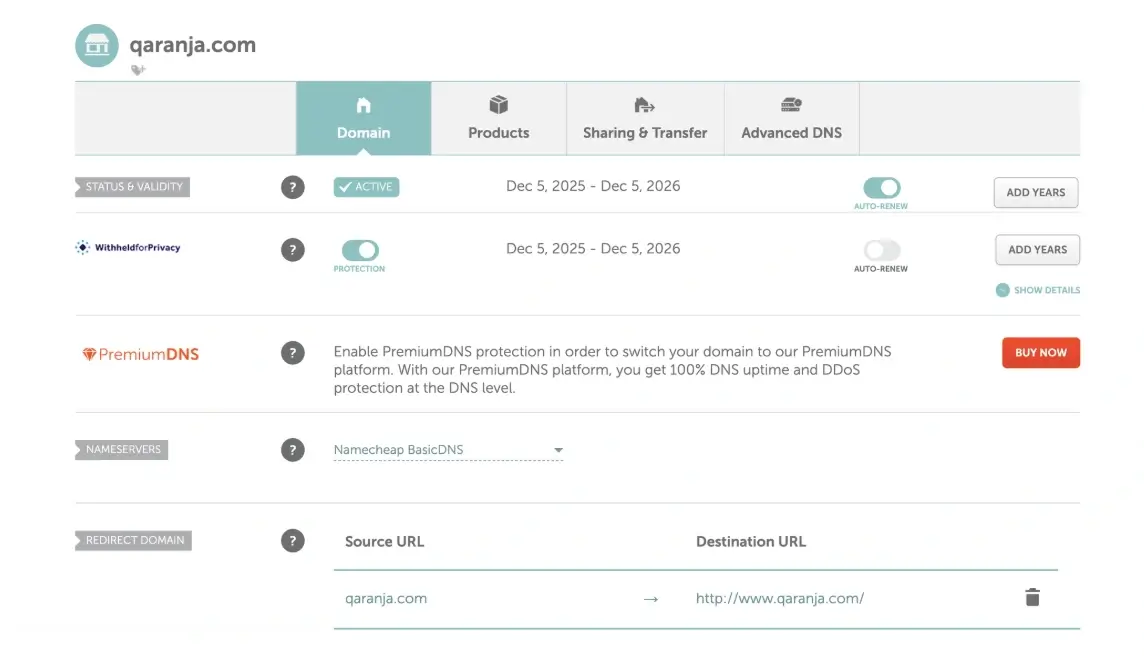
Scroll down to Redirect Email
Click Add Forwarder shown in red at the bottom
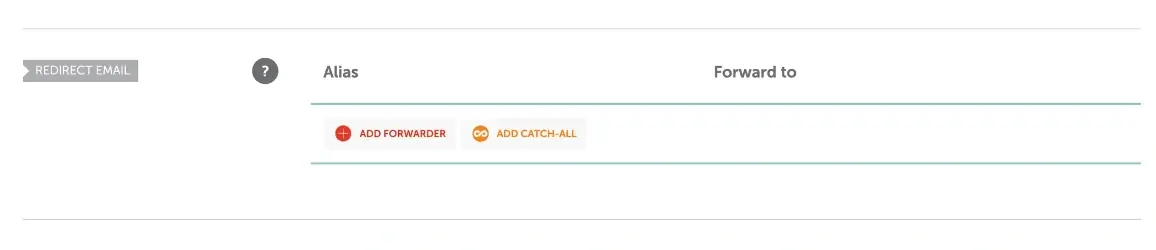
Fill in:
Alias → e.g. hello (for hello@yourdomain.com)
Forward to → your real email (e.g. Gmail)
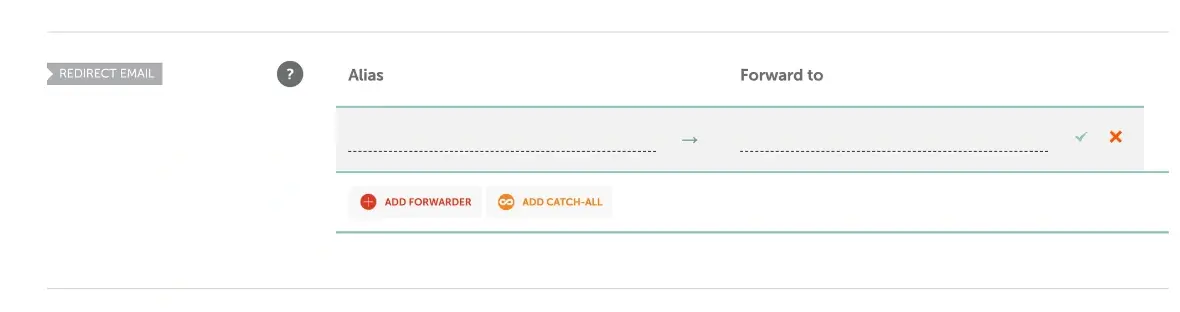
6.Save your changes
Click the checkmark to save all changes
What Happens Next
Email forwarding usually starts working within a few minutes, but may take up to a few hours to fully activate.
Common Issues
- Emails not forwarding
- Confirm the forwarding rule is active
- Check spam or junk folders
- Forwarding not working
- Ensure Mail Settings is set to Redirect Email
- Wait for DNS changes to propagate
We regularly review and update our guides to keep them accurate. If something looks off, email guides@snagged.com and we’ll fix it.