Hostinger
How to change nameservers on Hostinger

Quick Answer
To change nameservers on Hostinger, open your domain settings, enter the custom nameservers from your DNS provider, and save.
Steps to Change Nameservers on Hostinger
1. Get your nameservers
Copy nameservers from your DNS provider
2. Log in to Hostinger
Go to your Hostinger account
Click Log in
3.Open your domain
From the dashboard (hPanel), go to Domains
Click Manage next to the domain you want to update

4. Open nameserver settings
Click DNS/ Nameservers in the sidebar
Click Change Nameservers

5. Enter new nameservers
You’ll see two options:
Use Hostinger nameservers (default)
Change nameservers (custom)
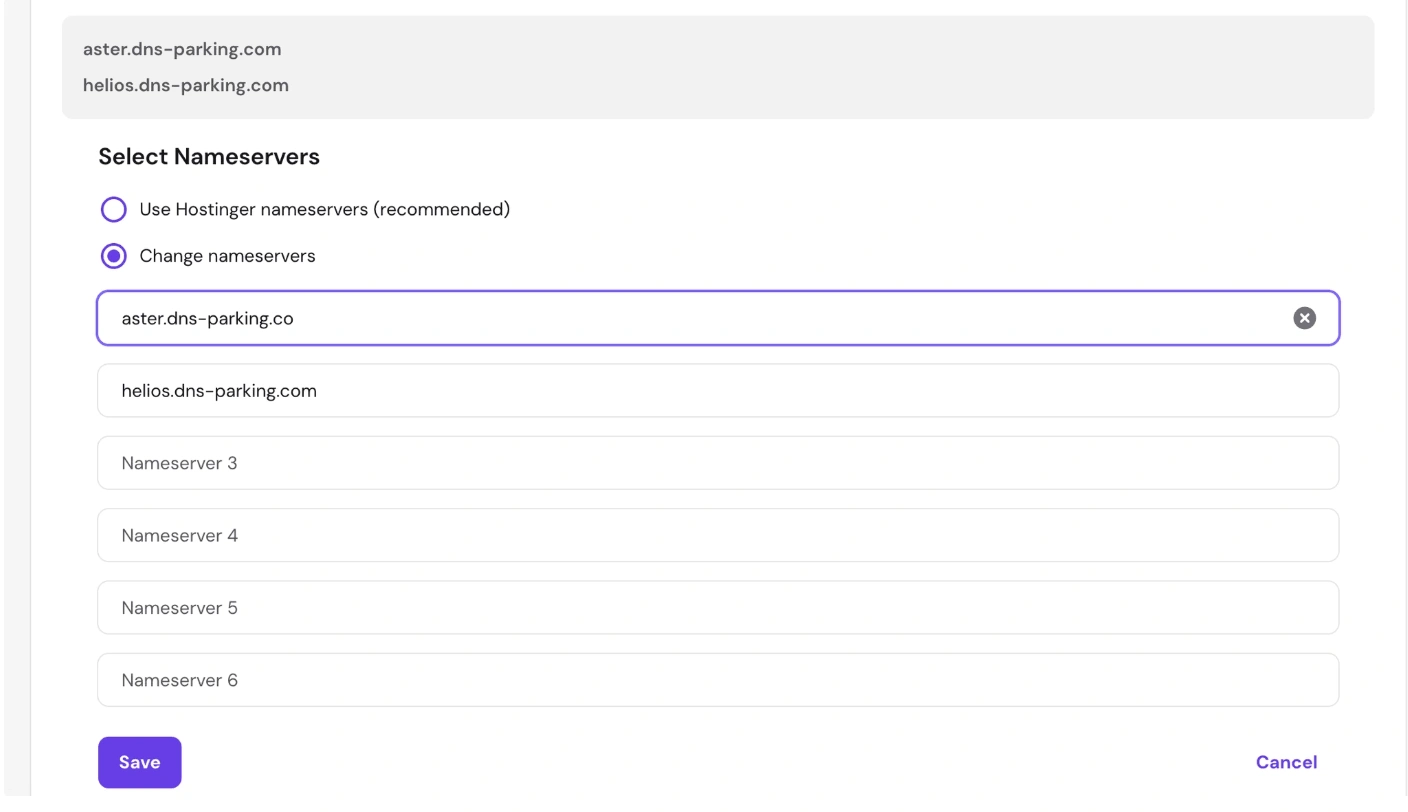
Enter up to 4 nameservers provided by your hosting/DNS provider
6. Save
Click Save to apply the new nameservers
Common Issues
- Website or email stops working
- Recreate DNS records at the new DNS provider
We regularly review and update our guides to keep them accurate. If something looks off, email guides@snagged.com and we’ll fix it.