How to change nameservers on GoDaddy

Quick Answer
To change nameservers on GoDaddy, log in to your account, open your Domain Portfolio, select your domain, and update the Nameservers settings. Changes typically take 24–48 hours to propagate.
Steps to Change Nameservers on GoDaddy
1. Log in to your GoDaddy account
Log into to your GoDaddy Account
Go to Profile located at the top right corner of your screen
Click “My Products” to access domain portfolio once the dropdown menu appears
2. Open your domain settings
Find the domain you want to manage
Click on “Domain” on the menu located at the far left of your screen
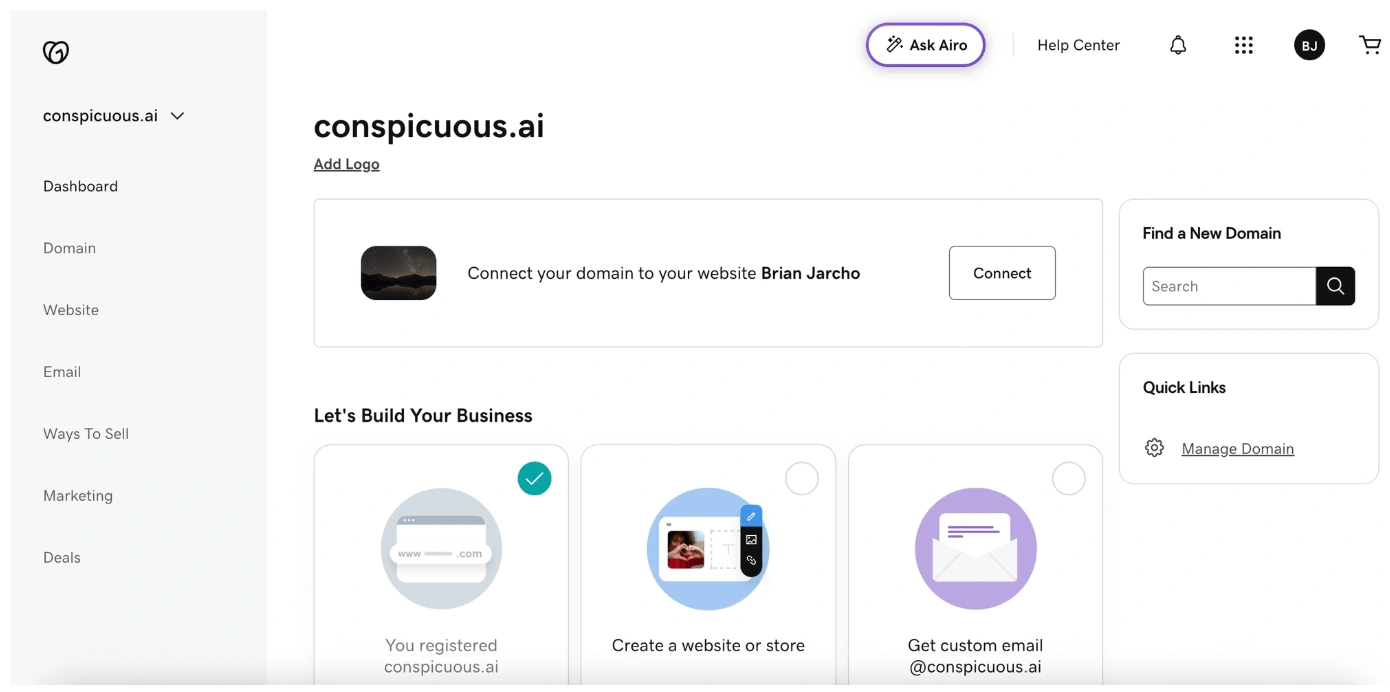
3. Locate nameserver settings
Now click on “DNS” then “Nameservers” on the menu at the top
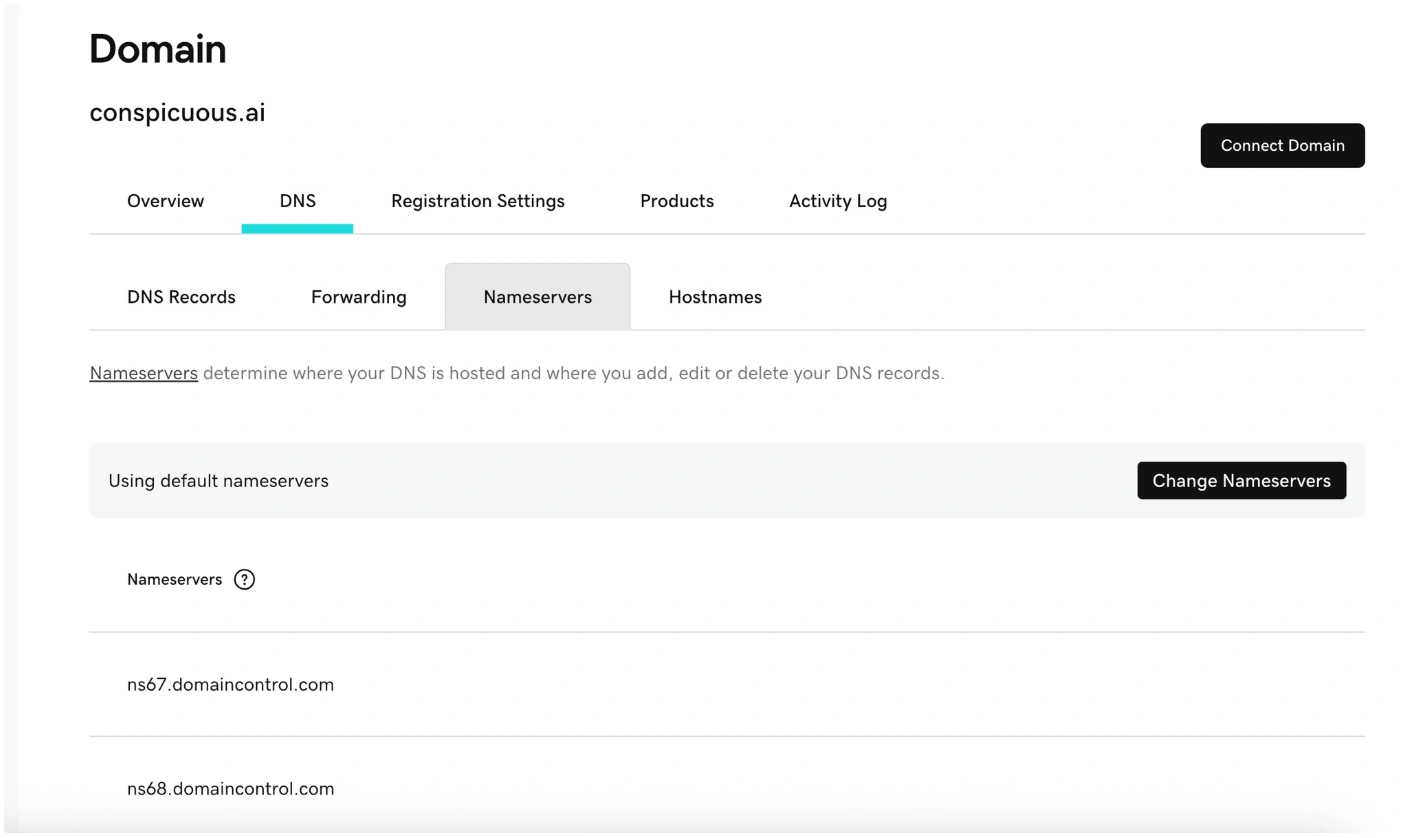
Once you click Change Nameservers, a pop-up will appear then select “I’ll use my own nameservers”
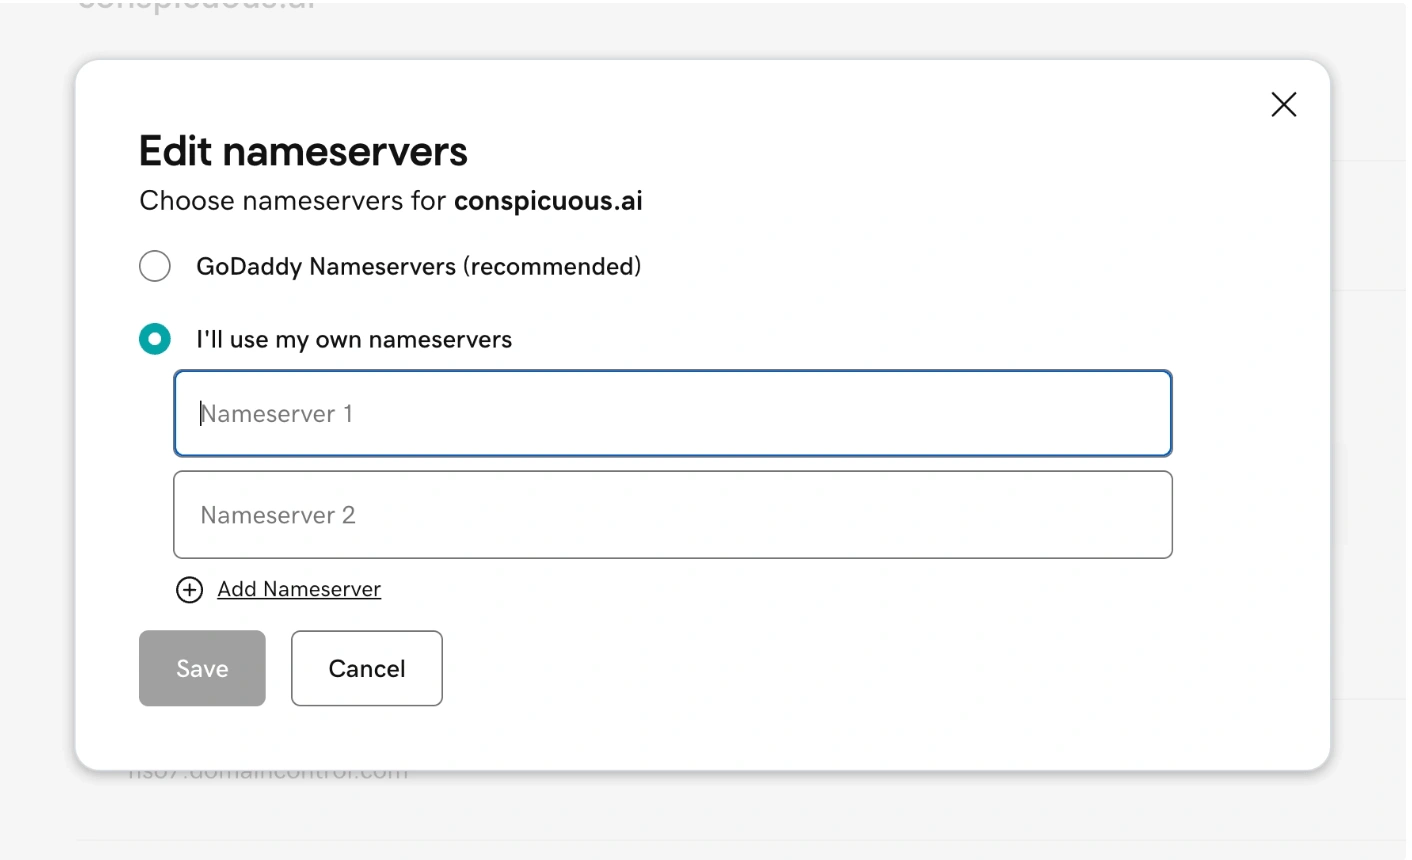
Input your new nameservers
Example:
ns1.example.comns2.example.com
4. Save your changes
Click Save
Confirm the update if prompted
What Happens Next
Nameserver updates usually take 24–48 hours to fully propagate
Your website or email may temporarily resolve to old settings during this time
Common Issues
- Nameservers not updating
- Double-check for typos in the nameserver values
- Wait for full DNS propagation
- Cannot change nameservers
- Ensure the domain is active
- Some settings may be restricted if using GoDaddy DNS products
We regularly review and update our guides to keep them accurate. If something looks off, email guides@snagged.com and we’ll fix it.